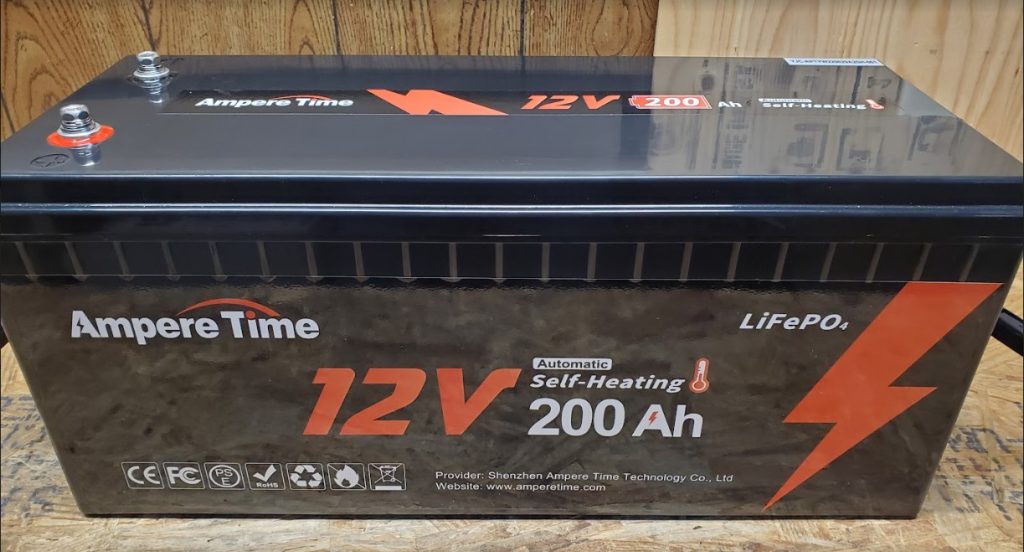
Today’s battery up for review is the 12V 200Ah self-heated model from Ampere Time. LiFePO4 batteries cannot typically be charged below freezing without risk of irreversibly damaging the cells. We are starting to see more and more models come to market with built-in heaters to address this concern; however, component choice and implementation are still relatively new (no common design standard yet) making this an interesting and unique feature to check out. Ampere Time has sponsored this battery for the purpose of review.
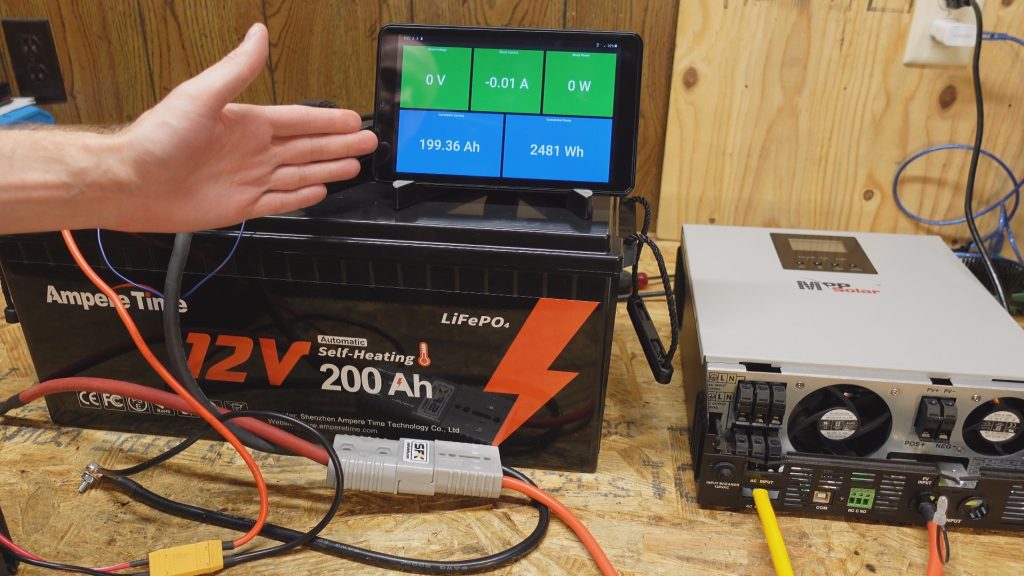
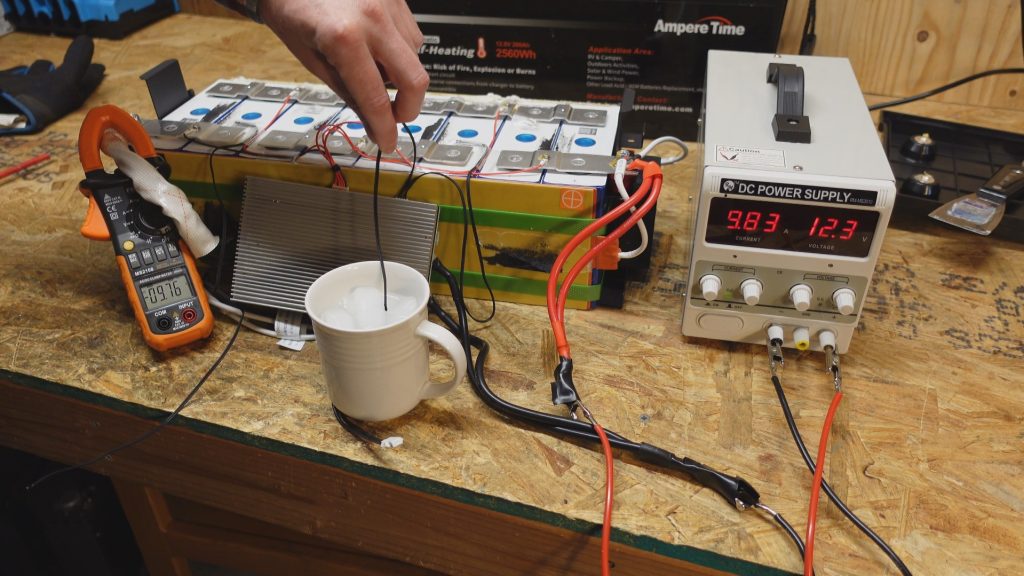
For the capacity test, I used an MPP Solar inverter connected to a Lasko space heater. Running the space heater on low will pull about 1000W from the battery, which is close to a 0.39C rate test. Typically I try to test around 0.2C to standardize the tests; however, I like pushing these larger batteries a bit harder.
The MPP Solar inverter unfortunately does not have as low of a disconnect voltage as the Bestek inverter does. I couldn’t use the Bestek inverter for this battery though, more on that later… The inverter cut out before the BMS of the battery, so I used a 12V mini heating element to discharge the battery the rest of the way. The result was pretty good, testing in at 199.36Ah. That’s close enough that I’m going to call it a pass. This was the very first cycle on the battery. I’d be willing to bet that with a little bit of balancing, we would be able to hit that 200Ah rating without issue.
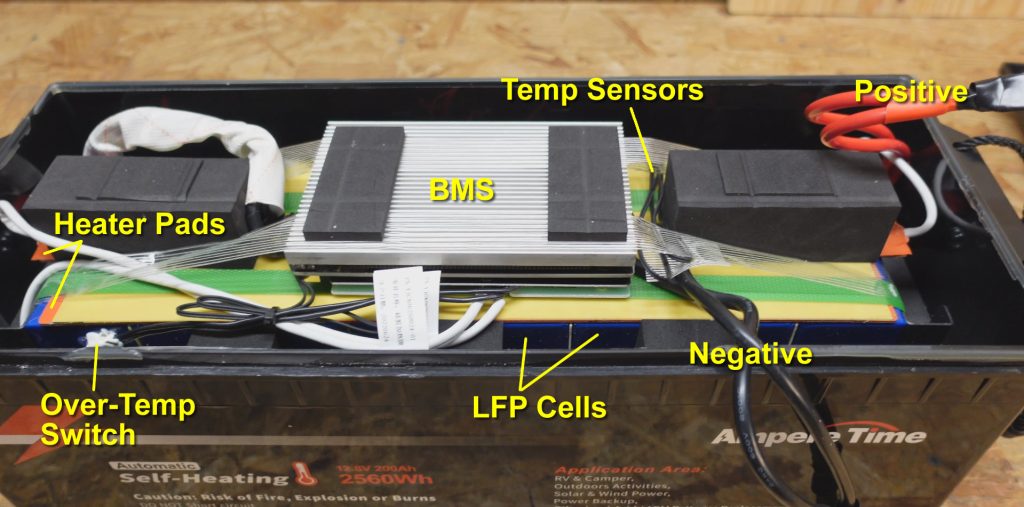
With the lid of the battery off, we get our first look inside and can see quite a variety of components right away. The main positive/negative wiring was done with a pair of 8 gauge silicone insulated cables. There are 4 temperature sensors, which we can see the wiring of coming out of the BMS. Additionally, there’s a thermal switch on the bottom of the battery pack for over-temperature protection.
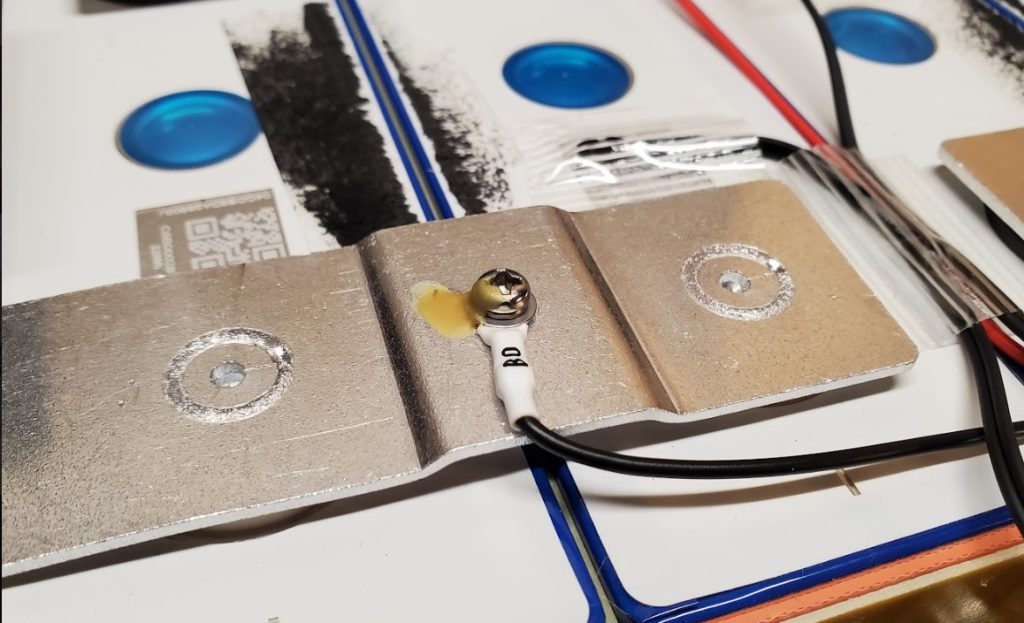
We can get a better look at the battery pack with it removed from the case and the padding/BMS components taken off. The pack consists of eight 3.2V 100Ah EVE-brand cells wired in groups of two to form a 12V 200Ah battery pack. The busbars consist of laser-welded aluminum strips. The balance leads are terminated with ring terminals and heat shrink in a threaded hole at the center of the busbars. The way the leads are affixed, placement of temperature sensors, and routing of the wires is all very well done.
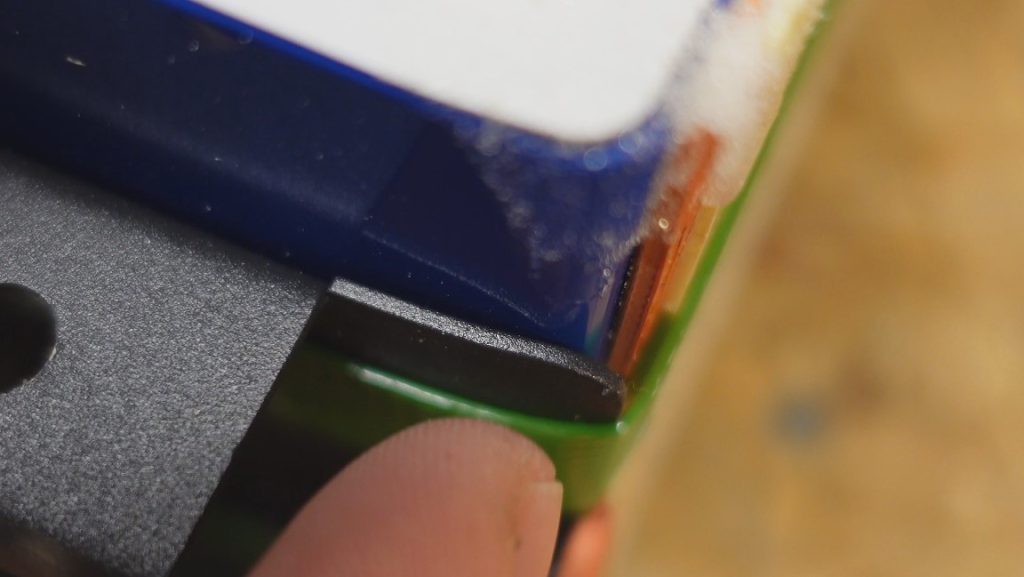
The battery pack is strapped together with two very tight plastic straps. You can see the heating pads a bit – they’re the orange tabs sticking out of each side. There is a layer of epoxy resin board sandwiching the heater pads against the battery. This is a very good design in my opinion. There are metal plates on both ends of the battery pack.
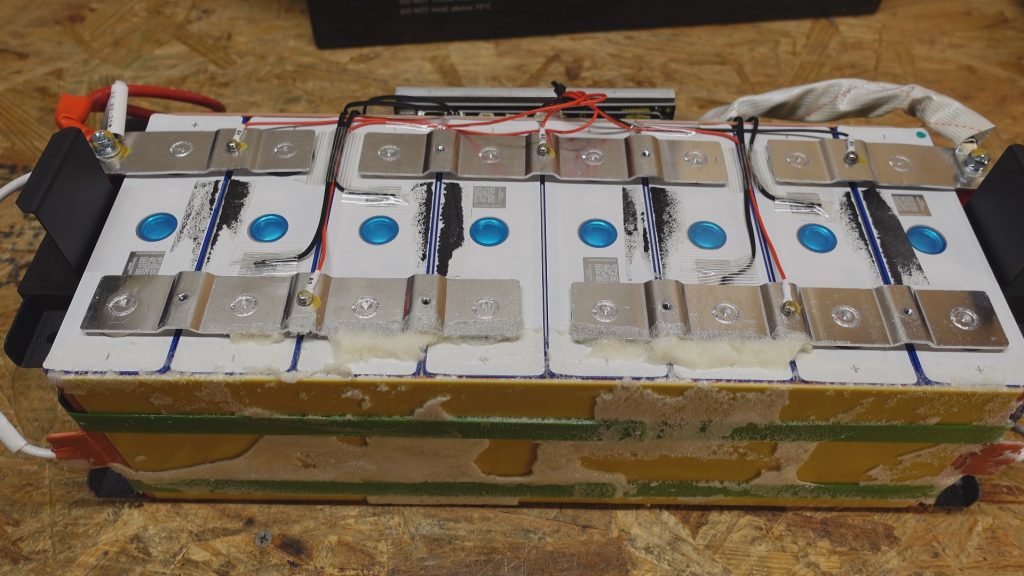
Now, while I do very much like the design of this battery, one thing I’m not overly-fond of is there appears to be no insulative material between the metal end plates and the battery pack. The plastic straps are so tight (not necessarily a bad thing) that they are bending in the corner of the metal plate in one area. This metal plate is being pressed against the corner of the cell. I can see this potentially being a point of failure in the future. They really should have some sort of insulative material here, maybe some neoprene foam or more epoxy board.
Lastly we’ll do some testing on the low temperature protection and heating functionality. As noted previously, there are four temperature sensors on the battery. I noticed these seem to serve two different purposes. The two sensors on the top of the BMS (near where the balance leads connect) will cause the battery to stop charging once a pre-set temperature is reached. The top sensors do not trigger the heating element to turn on. The two sensors on the bottom of the BMS (near where the heating element connects) will control the heating element. Originally I thought each set had a specific purpose; however, these two sensors also cause the battery to stop charging – so it does appear they have some input to the charging circuit. Either way, both heating and low-temp charge protection both worked perfectly.
This BMS does have some rather quirky behavior though. I noted earlier on that I could not use the typical Bestek inverter and had to use an MPP Solar inverter instead. I prefer the Bestek for these capacity tests because the low-voltage cutoff is very low, around 9.0-9.5V, and is typically low enough to trigger the battery BMS protection to kick in.
It’s difficult to explain, and there’s a demonstration in the video; however, here’s the behavior I saw. I have a charger and a load both connected to the battery terminals. The charger is putting out 10A while the load is consuming 7A, thus resulting in a net of 3A going into the battery. I should be able to shut the charger off and the battery will continue powering the load. Instead, what I’m seeing is the second I shut the charger off, the BMS cuts out and drops the load for a split second. It does turn back on and run normally but it’s just enough that it kills the inverter, and when the inverter turns back on, it’s tripping the over-current protection of the BMS. To make matters worse, a pre-charge resistor is useless since the disconnect occurs after everything is already connected.
I don’t know if this is a defect in the BMS or an oversight in the design. I’m leaning towards an oversight since everything else seems to work properly as-expected. I don’t know why one would want this to happen and it seems very problematic if being used in a solar power application where the charge current would fluctuate continuously throughout the day.
Other than the odd BMS behavior aside, this really isn’t a bad battery. The price is kindof steep though in my opinion. It sells for $949 at the time of this post. To put this in perspective, the non-heated version (without low-temp charging protection) sells for $649 at the time of this post. That’s an additional $300 just for the heating circuitry. I don’t know about you, but in my opinion, I’d much rather look at where to locate the battery such that it’s not subject to below-freezing temperatures in the first place and save my $300 🙂