Today, we’re going to take a look at a way to generate your own power during an outage caused by a storm, flood, or other natural disaster. This 5.1kWh portable power cart with an inverting capacity of 2.4kW can provide enough power to run your essential appliances including a full-size refrigerator, lighting, phone/computer chargers, and more. You can combine this with a few solar panels to provide endless power depending on the load you’re running and amount of sunshine during the day.
Before we go any further, we have to start off by saying that electricity and lithium batteries can be dangerous. This should come as common sense, but you’d be surprised. It’s very important to understand what you’re working with in its entirety. Both electricity and/or lithium batteries can cause serious injury, fire, burns, property damage, and more when used incorrectly or during malfunctions. This article is to discuss core concepts and is not intended to be a full tutorial or “how-to” lesson. All work should be carried out by, and advise sought from, a qualified professional.
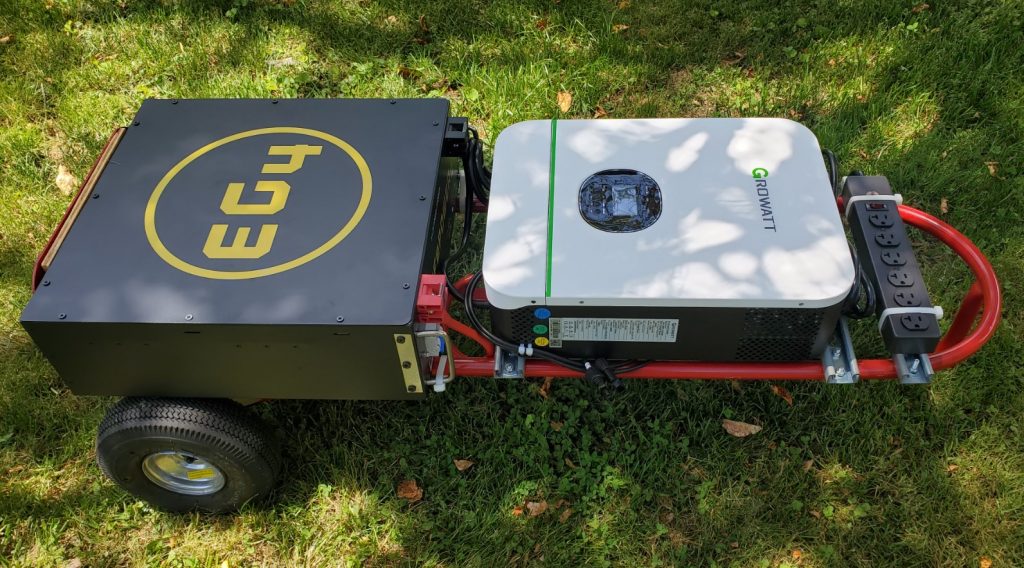
Let’s take a look at the core components. This build is heavy, weighing in at nearly 150lbs. It’s built on a heavy duty hand truck cart, which I purposely selected due to the large rubber wheels (not plastic) making it super easy to pull through the grass along with the D-style handle allowing it to lay down horizontally.
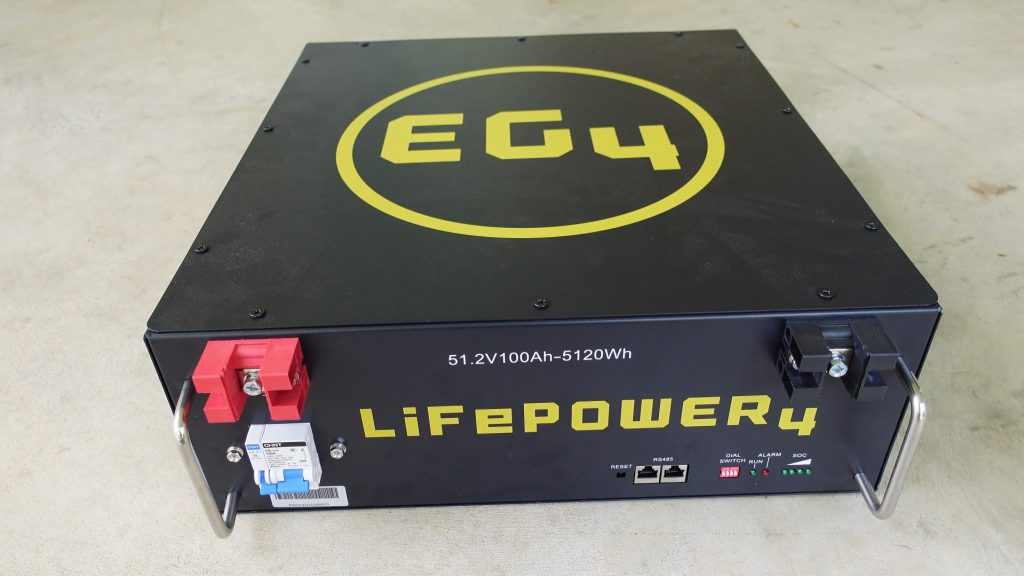
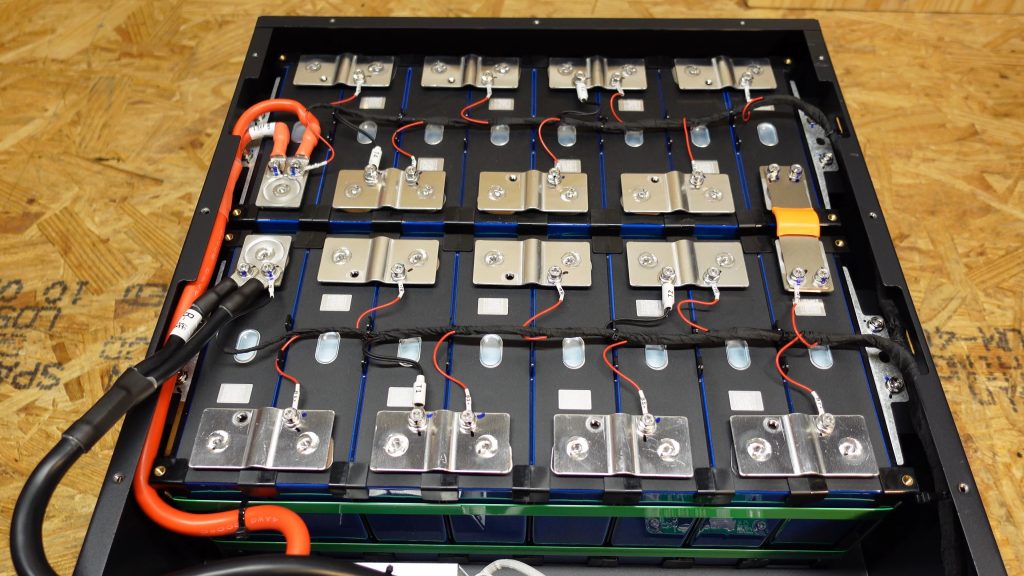
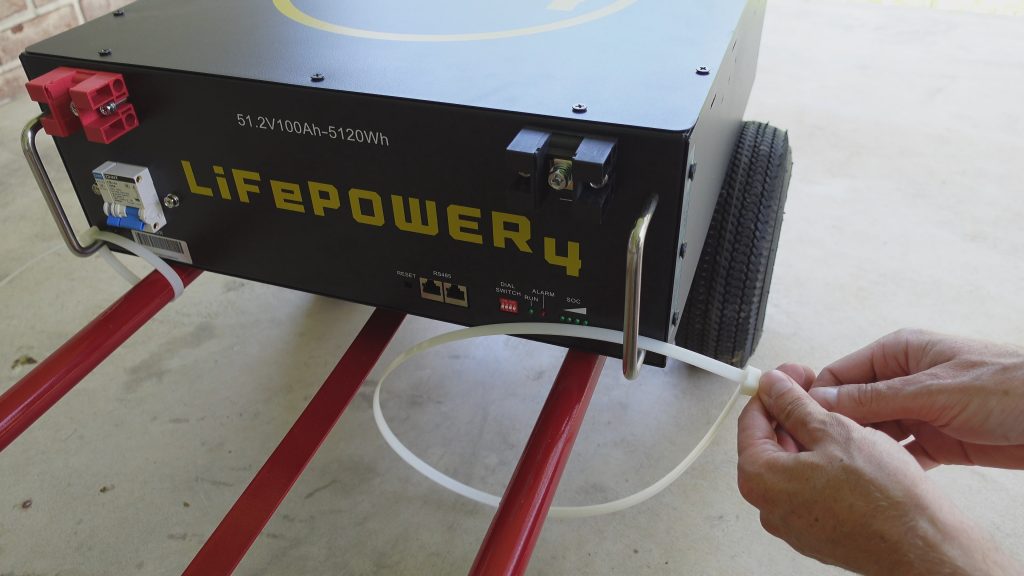
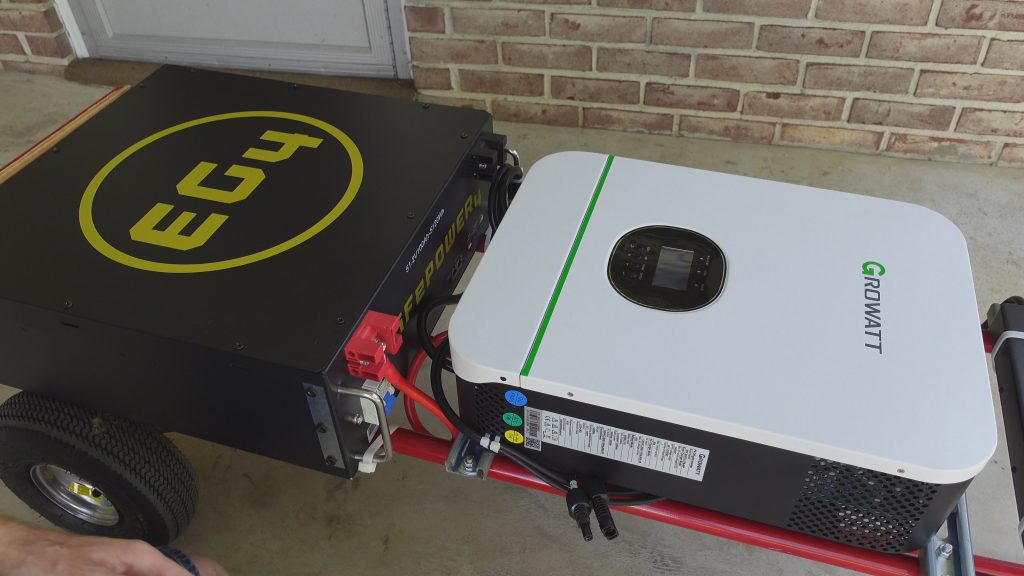
For the battery, I’m using a 48V lithium iron phosphate battery (often abbreviated LiFePO4 or LFP) from EG4 Electronics, model EG4-LifePower4. This is one of the cheapest rack batteries on the market that carries a UL 1973 certification.
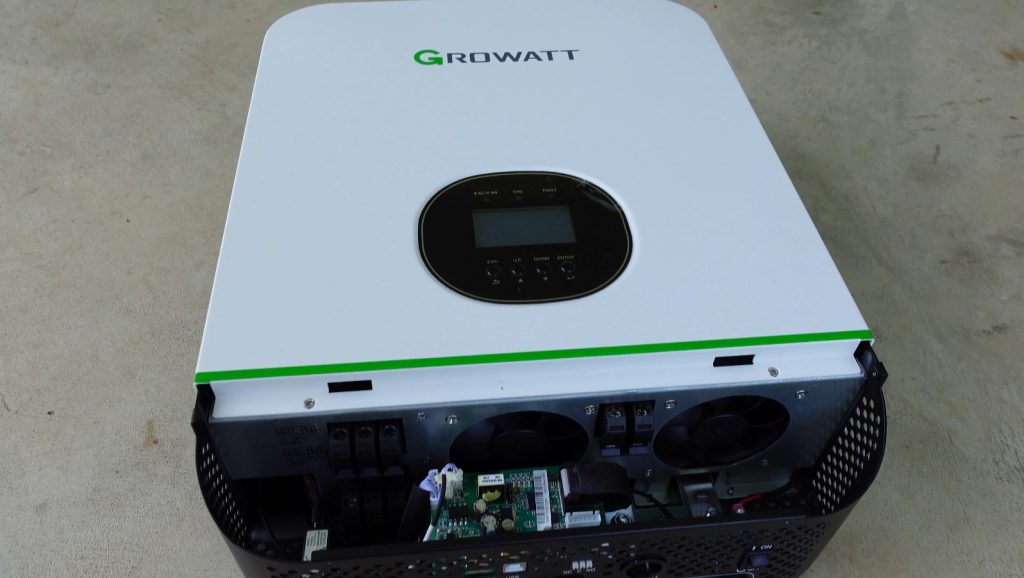
For the inverter, I used a Growatt SPF 3000TL LVM-48P. This is a 48V pure-sine inverter with a maximum output of 3000W at 120V. This is the first time I’ve used a Growatt inverter and I’m still not sure how I feel about it. They are on the cheaper end of the pricing spectrum, but the hardware seems solid and think it was a great choice for a build of this size.
Now this inverter is an all-in-one unit, meaning it also has a built-in AC charger and a solar MPPT charge controller. You don’t have to worry about adding separate pieces of equipment for charging. The MPPT charge controller is rated for a maximum of 4500W – way more than you’ll ever need for such a build. The great thing about this though is you can quickly and easily connect a few solar panels during an extended power outage and essentially have endless power (assuming the sun is out of course).
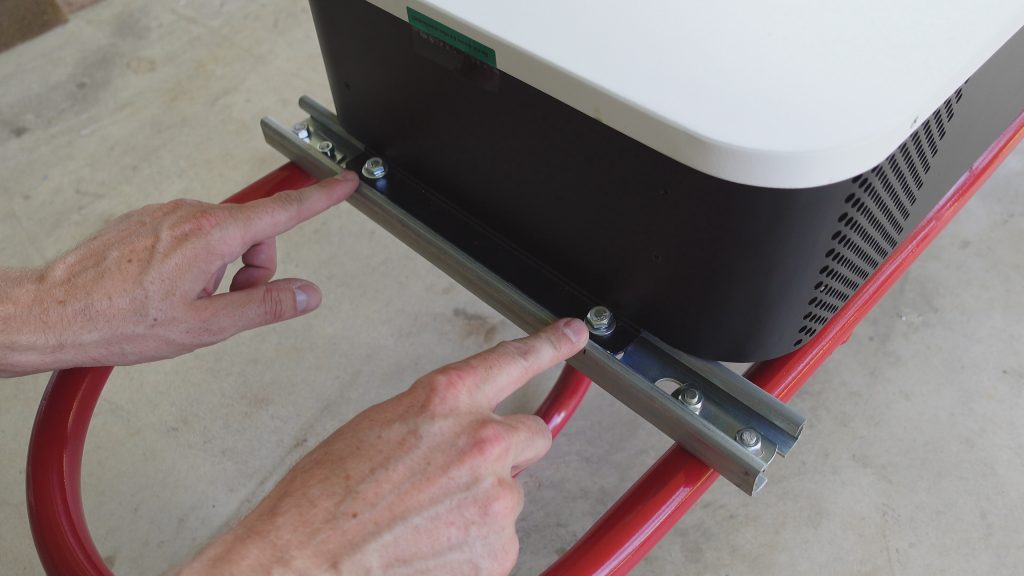
I secured the battery to the bottom of the cart so the weight would be supported by the cart and held it in place with a pair of heavy duty HVAC zip ties. Worm clamps would probably be a much better choice thinking about it after. To secure the inverter, I cut two pieces of low-profile strut channel and bolted it to the cart with a pair of U-bolts. Strut channel is very strong steel, often used in the electrical industry; however, has many applications elsewhere. You can find it in pretty much any hardware store in the electrical section. I then bolted the inverter using the provided mounting points to the strut channel on both the top and bottom of the unit.
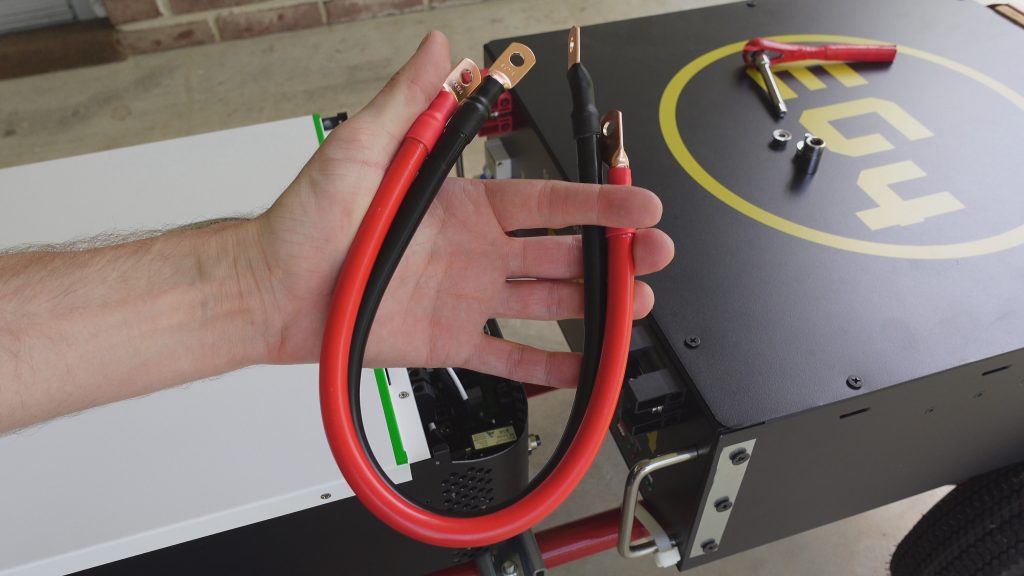
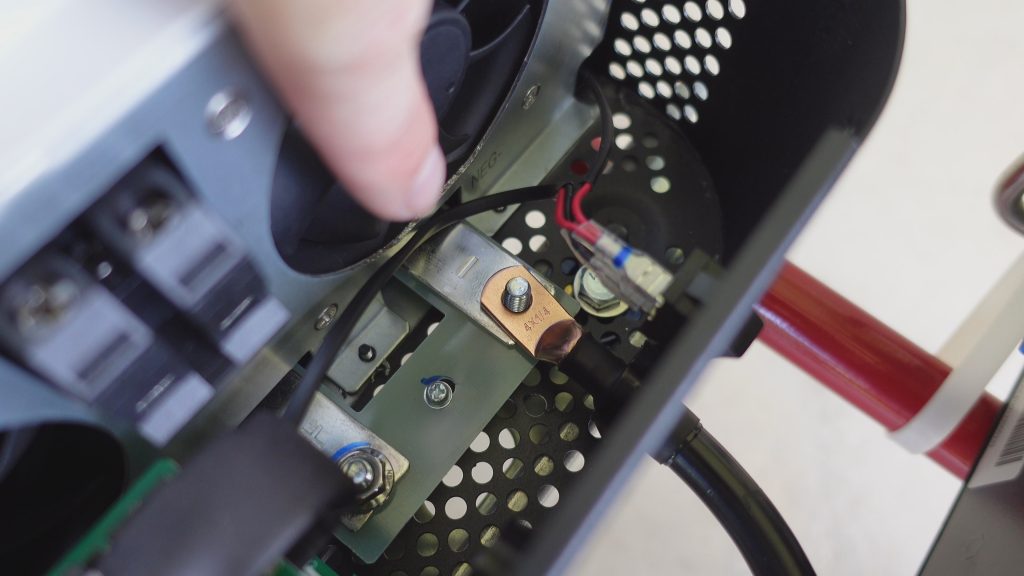
Next up, I made sure the circuit breaker on the battery was turned off then connected it to the inverter using a pair of 2 AWG copper cables, premade with lugs on the ends. It’s important to make sure not to mix up the positive and negative or you WILL blow up your very expensive inverter! Pre-made cables can be purchased from Current Connected.
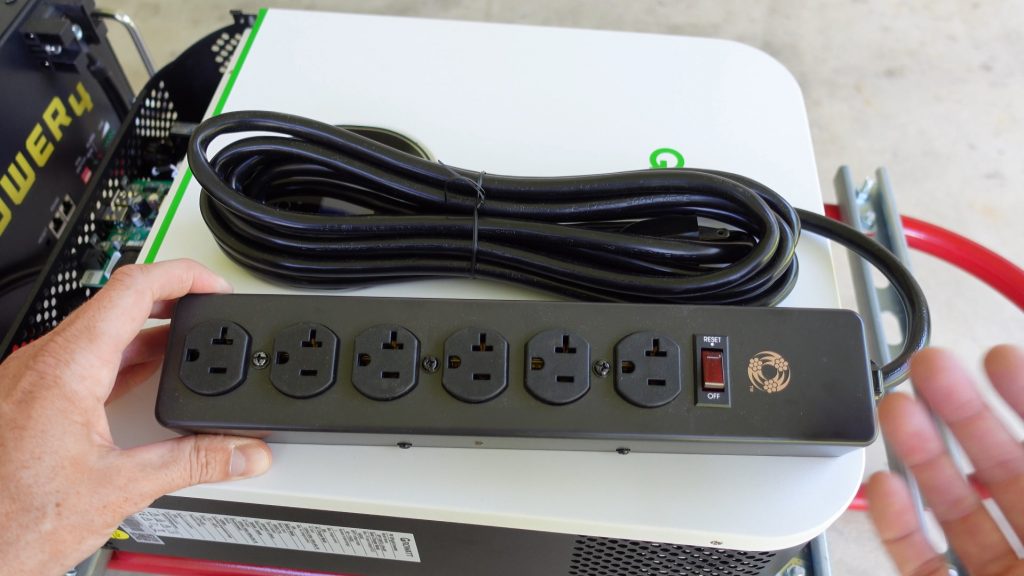
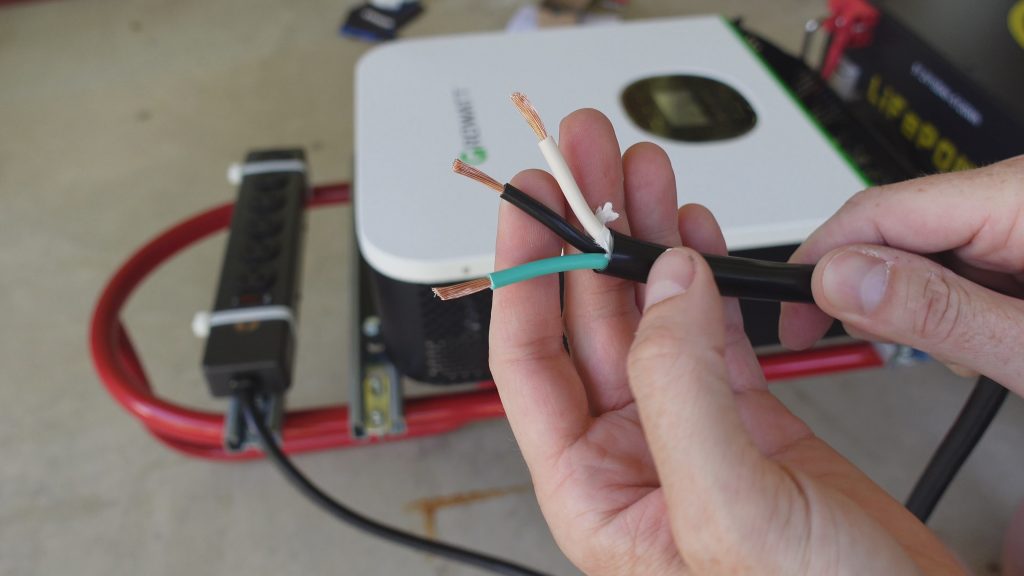
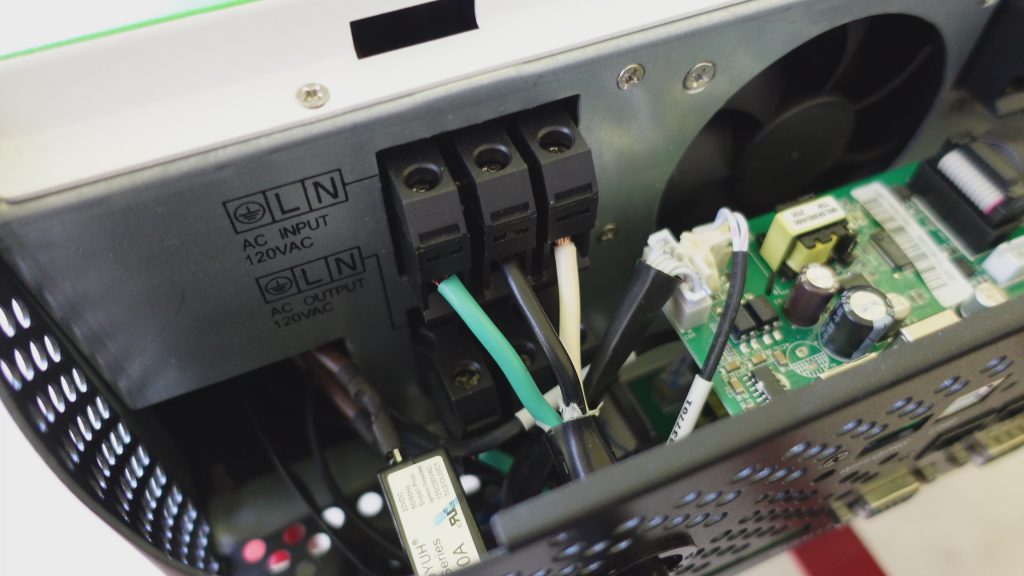
For the AC power connections (in and out) I selected this Southwire 20A power strip. I used this particular strip for a number of reasons. I didn’t want to worry about wiring circuit breaker panels and things of that nature. I wanted a power strip that was of heavy duty build quality, rated for 20A, contained over-current protection, and had properly-sized wiring. Believe it or not, finding a power strip that meets this criteria is no easy task. I’m so tired of the cheapy plastic strips everyone buys that contain thin wiring, sometimes 16AWG even, and don’t seem to last more than a few plugs. The Southwire 20A met every requirement on my list. I cut the cord about half way and used the cable with the male end for the AC input.
This is where it’s very, very important to understand electricity, wiring, and your power requirements. For example, while this is a 20A power strip, continuous loads (defined by the NEC as 3+ hours) require derating to 80% so that leaves you with 16A. This is even more critical for the AC input power cord. This requires a 20A receptacle on a dedicated 20A circuit and again, you cannot pull more than 16A. This includes any loads you have connected AND the power being consumed by the built-in battery charger. If you have any questions, please contact a licensed and/or certified electrician!
Lastly, we need to provide a way to connect solar panels to the inverter. I took an PV cable with MC4 connectors on the ends (it was an extension cable) and cut it in half. I connected this to the PV input on the inverter and coiled up the extra wire nicely long the side. Now it’s easy to pull out and connect your panels when needed. Make extra certain that you do not mix up the polarities here. It’s easy to do especially if you have red/black wires as those colors/markings may be in reference to the solar panel, not the opposing connector (remember, a male plug goes into a female plug). It’s best to use a volt meter to ensure correct polarity before making any connectors. Again, connecting them backwards is very dangerous and WILL blow out the MPPT charging circuit of your inverter.
That’s it! It’s a super easy build with HUGE potential. It can easily be stored in a garage or shed and pulled on when needed for a power outage or other occasional use. It’s great for those random power needs in remote locations that are far away from a reasonable source – such as power tools for yard projects. Make sure to program your inverter parameters for the charge and discharge voltage and current for your particular application. We won’t cover that in this particular document; however, maybe we can revisit that at some point. The video below covers the build in significantly more detail if you have any questions or want to learn more.

Complete Parts List: (Click to Purchase)
EG4 48V 100Ah LiFePO4 Battery
Growatt 48V 3000W Inverter
Milwaukee Heavy Duty Hand Truck
Southwire 20A Power Strip, NEMA 5-20 Plug
Battery Cabling 2AWG (with lugs)
Renogy 5ft 10AWG PV Extension Cable