Today’s task will be reinstalling the KVM/libvirt ecosystem on the new home server I’ve built out. The new server is running Oracle Linux 8.6. These instructions should also work for RHEL 8 and CentOS 8. The operating system has just been installed and the only software item checked at install was the “GNOME” option though the server will still boot to a terminal. The only real reason for installation of GNOME is for the GUI used to manage the virtual machines. Otherwise, I practically never tough GUIs on a linux server.
Step 1: The first thing I always do with software installations like this is to make sure the installed packages are all up to date.
[root@vmhost ~]# yum update
Last metadata expiration check: 0:03:40 ago on Tue 25 Oct 2022 09:27:44 AM EDT.
Dependencies resolved.
Nothing to do.
Complete!
Step 2: We’ll need to make sure virtualization is enabled. This is VT-d for Intel-based CPUs. It’s a configurable option in the BIOS that is almost always defaulted on. If you don’t see the output below indicating that it’s enabled, check your BIOS and makes sure the virtualization options are enabled.
[root@vmhost ~]# lscpu | grep Virtualization
Virtualization:      VT-x
Step 3: Install the virtualization group from the package repository. This pulled down 175 new packages on our freshly-built server.
[root@vmhost ~]# yum install @virt
[..]
Transaction Summary
===========================================
Install 175 Packages

Total download size: 106 M
Installed size: 371 M
Is this ok [y/N]:
Step 4: Verify that the KVM kernel modules have been installed and loaded successfully.
[root@vmhost ~]# lsmod | grep kvm
kvm_intel             339968  0
kvm                   905216  1 kvm_intel
irqbypass              16384  1 kvm
Step 5: Install a few useful tools for managing your virtual machines. They’re not required; however, I prefer to have them installed and ready to go should I need them later. I’ve found virt-top especially useful for monitoring resource utilization of the VMs on the host machine. On our system, this pulled down an additional 40 packages.
[root@vmhost ~]# yum install libvirt-devel virt-top libguestfs-tools
[..]
Transaction Summary
===========================================
Install 40 Packages

Total download size: 19 M
Installed size: 69 M
Is this ok [y/N]:
Step 6: Start the libvirt service and enable it to start on-boot.
[root@vmhost ~]# systemctl enable libvirtd
[root@vmhost ~]# systemctl start libvirtd
Step 7: If using a desktop environment, you can install the GUI management tools. As said above, this is pretty much the only thing I use the GUI on this server for. I’m always a terminal-type guy; however, this is one of those things that’s just easier for setting up the basics and seeing the host of options available for VMs. This pulled down an additional 57 packages.
[root@vmhost ~]# yum install virt-manager
[..]
Transaction Summary
===========================================
Install 57 Packages

Total download size: 26 M
Installed size: 79 M
Is this ok [y/N]:
Step 8: Now it’s time to set up the bridged interface for ethernet connectivity to the VMs. This is where it gets a bit uncertain for me. I’m used to traditional management of ethernet configuration using the ifcfg files with the ifup/ifdown commands. While this appears to still be semi-supported on RHEL 8 environments; it’s not installed by default and has been deprecated. Rather than installing the tools, I’ve decided to use this as an opportunity to learn the new commands using the Network Manager.
First, I’ll be removing the default bridge that was created as part of the libvirt installation. This is done by issuing a destroy command followed by removing the default network. It’s important to make sure this is being done from the server console and not over a SSH terminal as obviously this will interrupt the network connection to the server.
[root@vmhost ~]# virsh net-list
Name       State    Autostart    Persistent
----------------------------------------------------------
default    active   yes          yes

[root@vmhost ~]# virsh net-destroy default
Network default destroyed

[root@vmhost ~]# virsh net-undefine default
Network default has been undefined
Step 9: Let’s take a look at our installed devices. The motherboard we’re using here has dual gigabit interfaces named eno1 and eno2.
[root@vmhost ~]# nmcli device status
DEVICE  TYPE      STATE         CONNECTION
eno1    ethernet  disconnected  --
eno2    ethernet  disconnected  --
lo      loopback  unmanaged     --
Step 10: I have a dual port 10GbE card I’ll be adding but in the meantime, we’ll create a bridge using eno1 so we can learn the commands. The first step is to create the bridge interface named br0. The second step is to add the ethernet port eno1 to the bridge as a slave.
[root@vmhost ~]# nmcli connection add type bridge con-name br0 ifname br0
[root@vmhost ~]# nmcli connection add type ethernet slave-type bridge con-name br0-eno1 ifname eno1 master br0
Step 11: Once complete, you should see the new bridge listed under the device status. There are commands to restart the Network Manager through systemctl and through nmcli; however, I was unsuccessful in getting these to actually bring up the bridge interface. I found it easiest to simply reboot the machine and the interfaces came up correctly as shown below.
[root@vmhost ~]# nmcli device status
DEVICE  TYPE      STATE         CONNECTION
br0     bridge    connected     br0
eno1    ethernet  connected     br0-eno1
eno2    ethernet  disconnected  --
ens1f0  ethernet  disconnected  --
ens1f1  ethernet  disconnected  --
lo      loopback  unmanaged     --
Step 12: Finally, we should have an IP address assigned to the bridge interface from DHCP. The networking is ready to go at this point. I clearly have quite a bit more to learn regarding the commands and their syntax. I find it significantly easier to set up the old way through the ifcfg files, but guess we have to continue moving forward to newer and better things.
[root@vmhost ~]# ip addr
1: lo: <LOOPBACK,UP,LOWER_UP> mtu 65536 qdisc noqueue state UNKNOWN group default qlen 1000
    link/loopback 00:00:00:00:00:00 brd 00:00:00:00:00:00
    inet 127.0.0.1/8 scope host lo
       valid_lft forever preferred_lft forever
    inet6 ::1/128 scope host
       valid_lft forever preferred_lft forever
2: eno1: <BROADCAST,MULTICAST,UP,LOWER_UP> mtu 1500 qdisc mq master br0 state UP group default qlen 1000
    link/ether ac:1f:6b:43:f2:30 brd ff:ff:ff:ff:ff:ff
3: eno2: <NO-CARRIER,BROADCAST,MULTICAST,UP> mtu 1500 qdisc mq state DOWN group default qlen 1000
    link/ether ac:1f:6b:43:f2:31 brd ff:ff:ff:ff:ff:ff
4: br0: <BROADCAST,MULTICAST,UP,LOWER_UP> mtu 1500 qdisc noqueue state UP group default qlen 1000
    link/ether ac:1f:6b:43:f2:30 brd ff:ff:ff:ff:ff:ff
    inet 192.168.0.120/24 brd 192.168.0.255 scope global dynamic noprefixroute br0
       valid_lft 4266sec preferred_lft 4266sec
    inet6 fe80::f503:e05a:c64e:33b9/64 scope link noprefixroute
       valid_lft forever preferred_lft forever
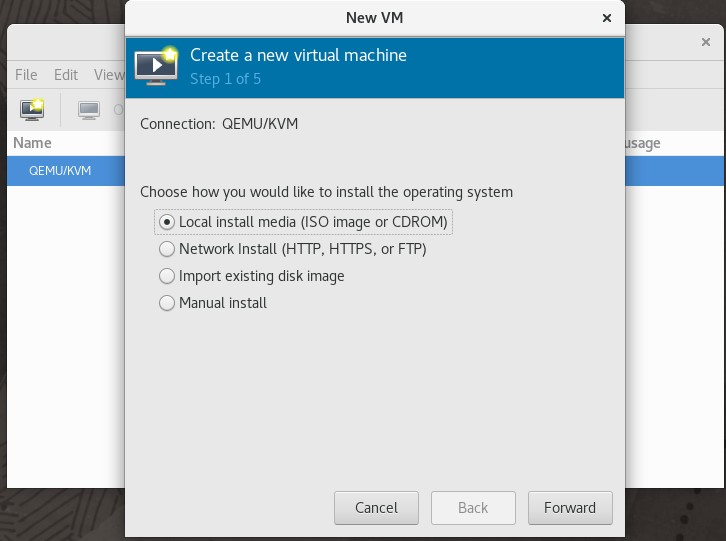
Step 13: If you chose to set up the GUI manager, you should be able to access it and begin setting up your virtual machines at this point. It’s almost time to get things moved over!
‘