I have a server running with a primary purpose of serving a few different virtual machines. These include things like a MySQL database, Grafana, over-the-air DVR software, security cameras, things I’m testing out, etc. This server has come a long way from it’s originally-designed purpose of one or two VMs for learning. It was built using a Biostar TZ77XE3 motherboard and an Intel i7-3770 CPU. I built this around the time the 3770 CPUs were released, putting it around 10 years old. It’s lived a long and happy life, never skipping a beat.
It’s still working well and was fine continuing on with it; however, I’ve run out of useful PCIe slots. I have a 10GbE network card I’d like to install and even when I do, the motherboard refuses to boot up. Now if I wait for it to begin posting then insert the card while it’s turned on, it actually recognizes the card and does work; however, that’s certainly not how you’re supposed to use PCIe cards. Additionally, I’m pushing the limits of available memory at this point. Being a 3rd generation CPU, it’s limited to 32GB of DDR3. It’s time for an upgrade!
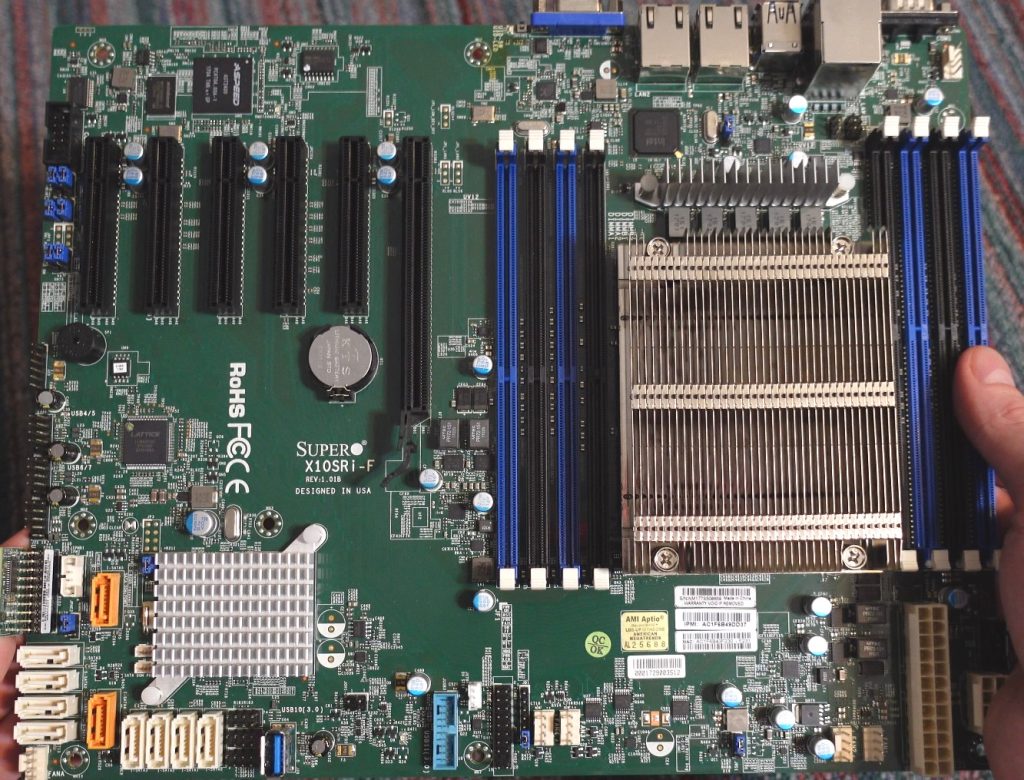
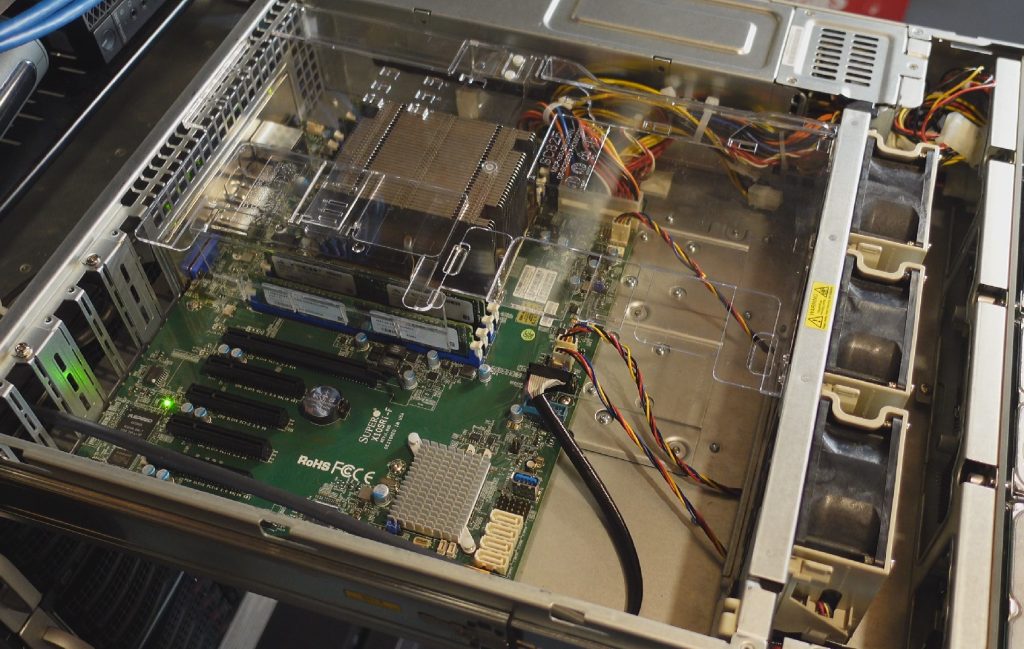
For the new server, I’ll be using a Supermicro X10SRi-F motherboard. This motherboard is pretty much perfect for what I’m trying to accomplish. It has six PCIe slots (of which 4 are PCIe 3.0), ten on-board SATA ports, and dual 1GbE network ports. It’s a DDR4-based system supporting up to 256GB of RDIMM and 512GB of LRDIMM memory along with the Xeon E5-2600 v3/v4 CPU iterations. It even has an IPMI port with a remote console so I won’t have to connect a monitor, keyboard, and mouse every time I need to check or troubleshoot something that can’t be done through a standard SSH terminal. There’s pretty much nothing missing on this board that I’d want. You can view the full specs of it here on the Supermicro website.
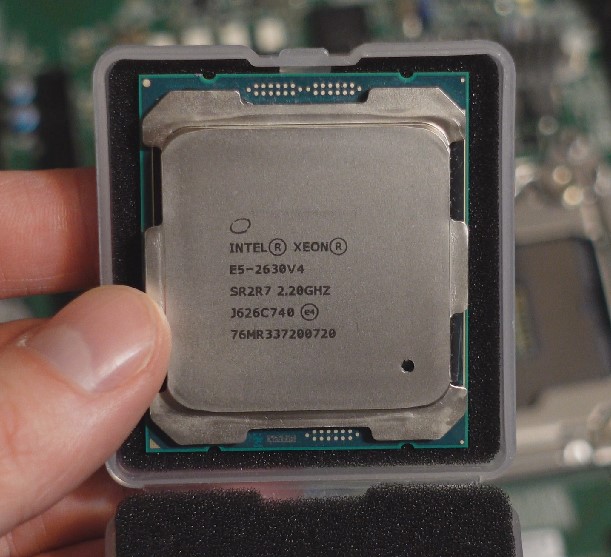
For the CPU, I decided to go with the Xeon E5-2630v4. This CPU is a 10-core with 20 threads. That’s a 2.5x increase in cores from the i7-3770 that I’ll be replacing. It has a base clock of 2.20GHz boostable to 3.10GHz and runs at only 85W. This seemed like the best option in terms of cores and wattage. Many of the other options around similar number of cores were 100W or higher and, while we all like bigger/better things, I didn’t want to be eating that much power when it wouldn’t buy be much in terms of my own usage.
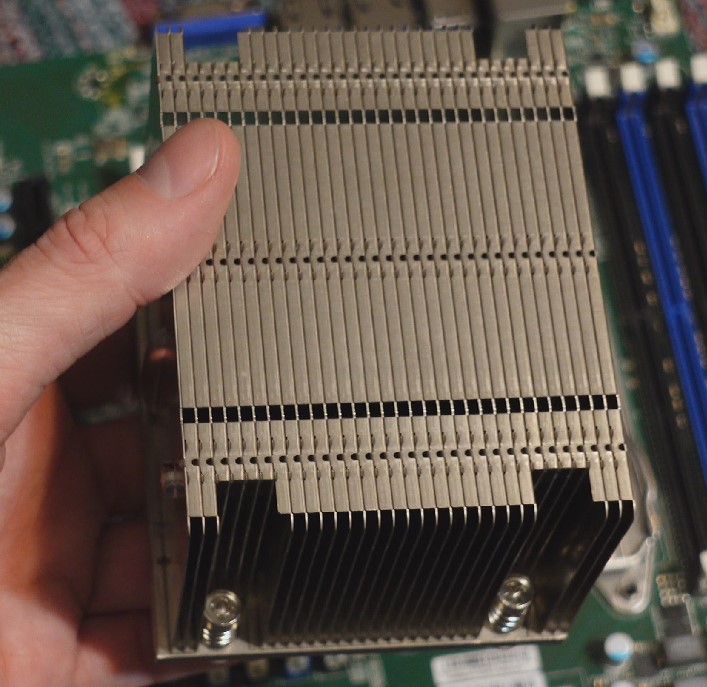
The motherboard came with a 1U-sized heatsink. I’ve replaced it with a 2U-sized heatsink that I pulled from another spare board I had. This offers much better thermal mass. Neither heatsink has a fan attached and instead relies on forced air over the heatsink from the fan housing located in the middle of the chassis (which is a Supermicro CSE-826). I removed and replaced these fans with something quieter when I put the Biostar motherboard in. I guess I’ll be needing to return them now.
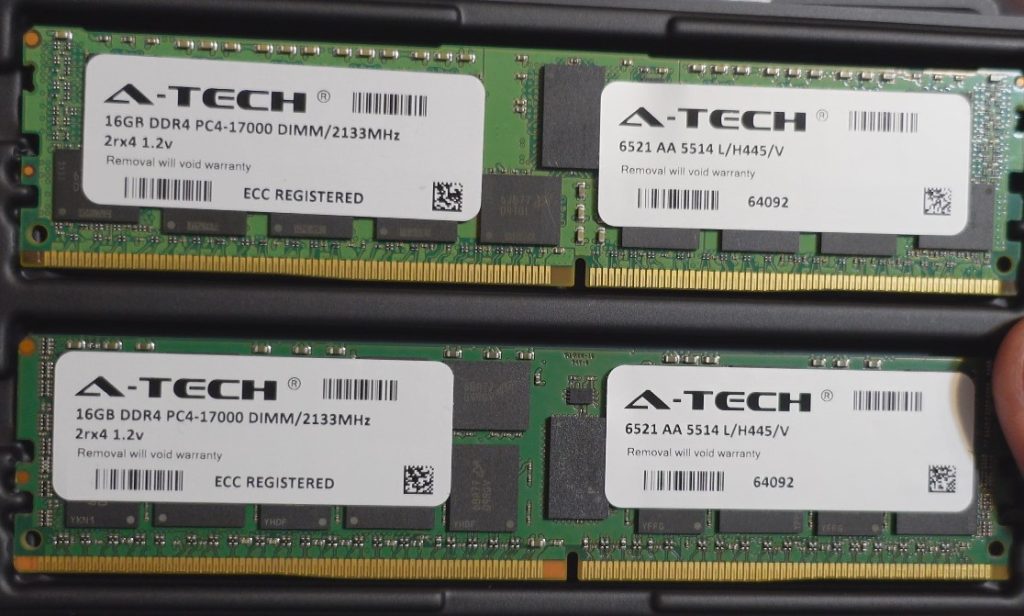
For the memory, I’ll be using 16GB sticks of A-Tech DDR4 PC4-17000 2133MHz. This will give me double the memory of the original system at 64GB and still allow 4 free slots for future expansion if desired.
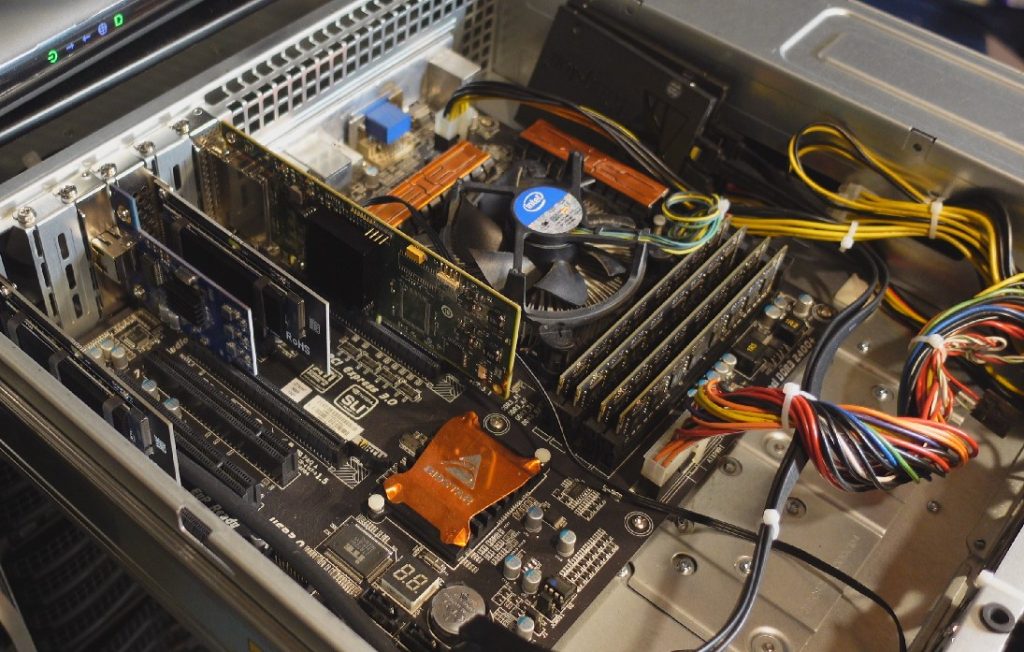
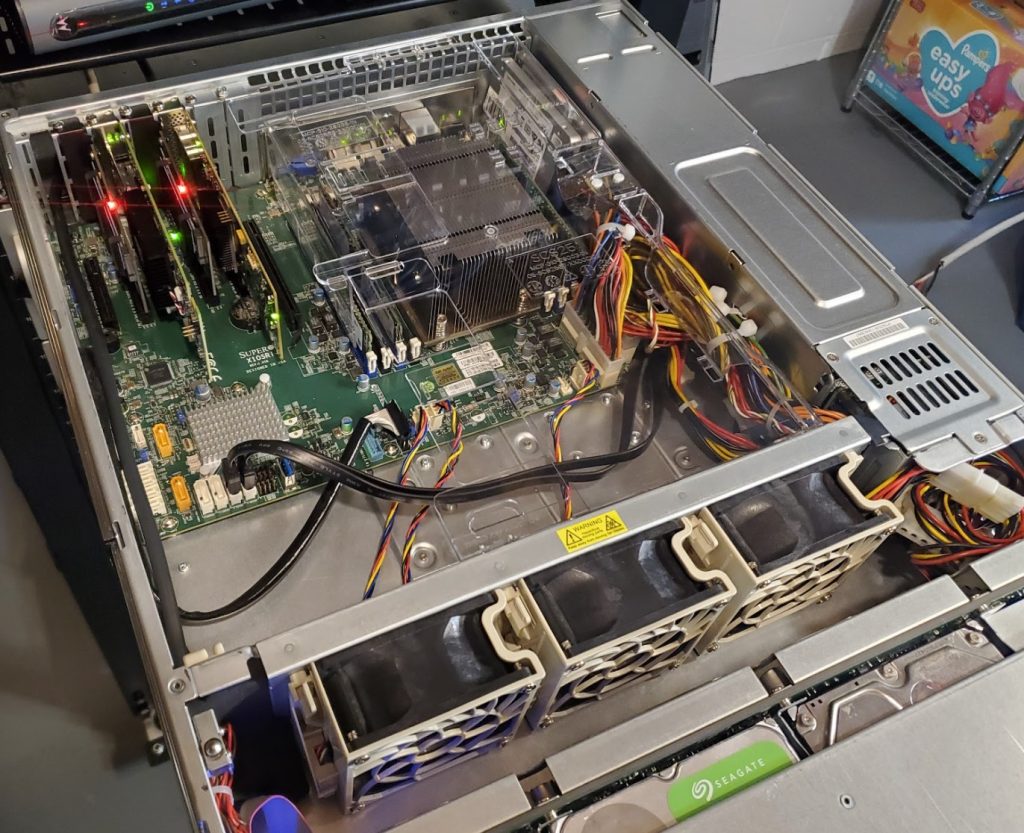
I’ve got the motherboard installed, the original fan rack returned with the high-speed fans, and the plastic baffle installed to direct air over the CPU. It’s looking so good!! I originally replaced these fans due to the noise and power consumption. This new motherboard has four fan headers and is designed to work with these fans/cases. I’m hoping the motherboard will be able to throttle down the fans to reduce noise/power when the added cooling isn’t needed. We’ll see how it works out. Also, with this being a Supermicro motherboard, I’m able to use the ribbon cable that connects to the front panel LEDs and buttons – an added bonus.
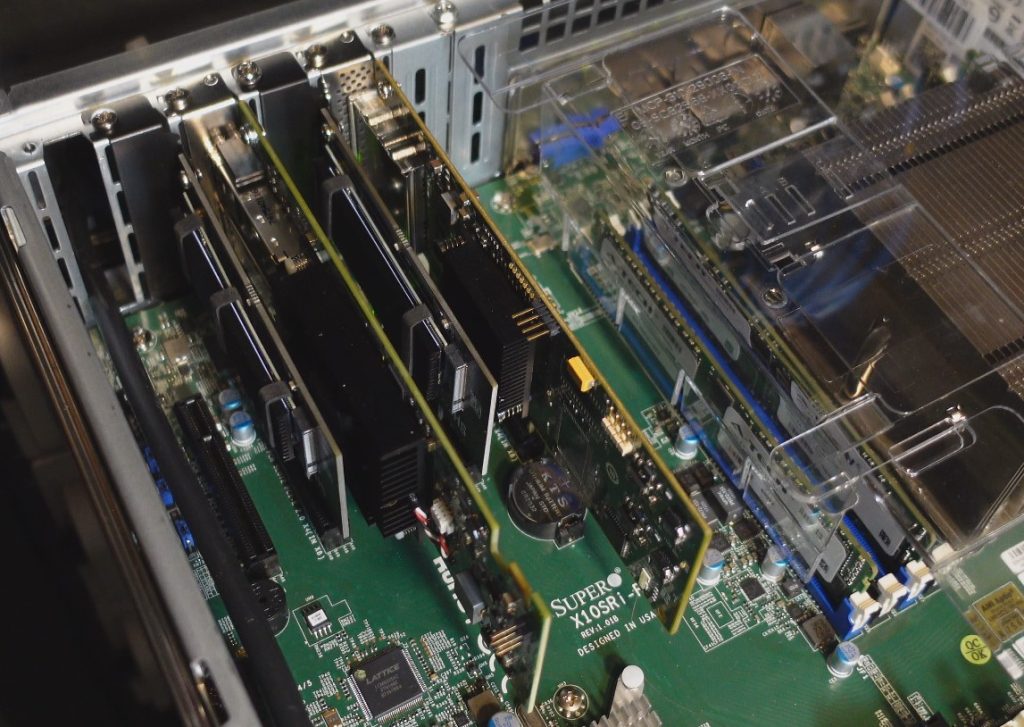
Lastly, the expansion cards have all been returned. The lineup from right to left includes the Emulex 10GbE network card with dual SFP+ ports (I’ll be using an RJ45 transceiver). Next is an NVMe riser, then the LSI SAS9200-8e disk controller, followed by a second NVMe riser. The two NVMe cards are running Western Digital Blue SN550 1TB drives which are in a software RAID1. This storage array is used for hosting the virtual machine images. I did notice the last NVMe card is slightly blocking the fan on the SAS controller. There is a free port at the end; however, while that is an x8 slot, it’s only wired for x2 and I need the full x4 for the card since this is only a PCIe 2.0 slot. I do believe there is plenty of space and airflow for cooling and will be making sure to check.
Ready for the initial startup! I’ve already installed the operating system. I’ll be running Oracle Linux 8.6 on this system. I have used CentOS extensively in the past; however, I don’t like their decision to move upstream of RHEL rather than downstream as they were prior. Oracle Linux is free to download and use. It’s pretty much identical to RHEL but with Oracle’s own repository and kernel options.
I should mention too that the operating system is installed on a pair of 800GB OCZ Intrepid SSDs. I purchased these used from eBay with about 300TBw on them. They’re enterprise-grade and rated for about 5PBw so there is more than plenty of endurance left for my use. While 300TB sounds like a lot of data written, that’s only about 6% used and is still practically new in my opinion! You can see them nestled in the top-right of the enclosure. This is not where SSDs should be installed; however, I didn’t want to use up the 3.5″ SAS bays in the front nor did I want them routed through the SAS controller. I’d prefer they be attached directly to the motherboard – so that’s where they went.
Successful startup!! We’re idling just under 100W. That’s about 25W more than I was seeing on the old system and includes however much extra the new 10GbE network card added (probably 10ish if I had to guess). Now it’s time to get all of those VMs moved over.
Be sure to check out the video of the build on Youtube if you haven’t already.